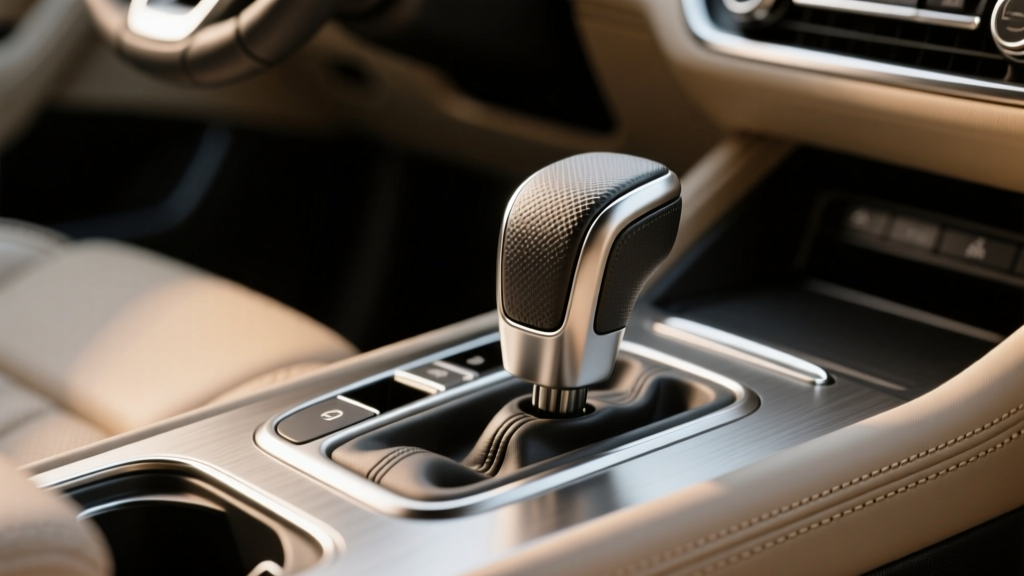
Commercial Vehicle Gear Shift Cover Installation (2026)
After you?ve chosen the right gear shift cover and verified basic fitment, the real difference comes down to installation quality. A cover that?s installed correctly feels tight, looks factory-clean, and survives daily abuse?gloves, dirt, constant shifting, and the occasional coffee spill. A rushed install, on the other hand, can bunch up, rotate, snag when you go into gear, or even tear at the seams within weeks.
Commercial vehicles are especially demanding. Delivery vans, work trucks, and fleet vehicles typically see longer drive hours, more in-and-out cycles, and harsher conditions than a weekend cruiser. That means your shift boot or gear shift cover isn?t just cosmetic?it?s a wear component that affects cabin comfort, cleanliness, and even noise levels around the shifter area.
This Part 2 guide focuses on the details that separate a ?good enough? install from a professional result: alignment, trimming, clamping, sealing, and troubleshooting. If you installed a universal cover in Part 1 (or you?re about to), this is where you make it look and perform like it belongs in your cab.
Tools and Materials Checklist (What You?ll Actually Use)
Most commercial vehicle gear shift cover installations are straightforward, but having the right supplies prevents rework. Here?s a practical kit you can pull together in minutes.
- Trim tools (plastic pry tools) to protect interior panels
- Phillips/flathead screwdrivers or Torx bits (varies by model)
- Needle-nose pliers for clips and small clamps
- Utility knife or sharp scissors for trimming universal covers
- Measuring tape or ruler
- Marker/chalk for alignment marks
- Zip ties (multiple sizes) or small hose clamps for the collar
- Double-sided automotive tape (3M-style) if your bezel needs support
- Isopropyl alcohol and microfiber cloth for surface prep
- Optional: heat gun or hair dryer (low heat) to relax stiff vinyl/leatherette
Real-world tip: If you drive a fleet vehicle, keep a few spare zip ties and a small trim tool in the glove box. If a collar loosens on the road, you can stabilize it in five minutes.
Pre-Install Prep: Fitment Confirmation and Cab Setup
Confirm shifter type and boot style
Commercial vehicles can have:
- Manual transmissions with a classic shift boot and retaining ring
- Automatic column shifters (often no boot at all)
- Automatic floor shifters with a trim bezel and integrated boot
- Heavy-duty manual with a taller lever and bigger opening at the floor
If your truck has a tall lever and a large floor opening, choose a heavy-duty or ?truck? boot with reinforced stitching and extra height. Universal passenger-car boots often look stretched and will tear early.
Set the cabin up for access
- Park on a flat surface, set the parking brake, and ensure the vehicle won?t roll.
- Move the seats back (or remove a center console insert if equipped) for workspace.
- Clean the area around the shifter with alcohol to remove silicone, grime, and dust.
Why cleaning matters: Many shift covers rely on friction, clamping, or tape at the bezel. Dirt acts like a lubricant and causes the boot to creep or rotate over time.
Step-by-Step: Installing and Finishing the Gear Shift Cover (Professional Method)
Step 1: Remove the trim bezel and inspect the mounting points
- Use a plastic trim tool to gently pry the shifter bezel/trim panel upward.
- Disconnect any wiring if present (12V socket, seat heater switches, drive mode buttons).
- Inspect the factory boot attachment: clips, staples, a retaining ring, or adhesive.
- If clips are brittle: Replace them now. Reusing tired clips is a top cause of a loose bezel.
- If adhesive was used: Remove residue with alcohol. Avoid harsh solvents that discolor plastics.
Step 2: Test-fit the new cover and mark alignment
Before you lock anything down, test fit and ?clock? the cover so seams face where you want them.
- Slip the cover over the shift lever (or over the shifter housing if it?s a bezel-style boot).
- Rotate it until the seams are centered (common: seam at rear or sides, not front).
- Use a small marker/chalk dot on the underside of the bezel to remember orientation.
Real-world example: On work vans that see constant shifting (stop-and-go routes), a seam placed at the front tends to rub from hand contact and can fray faster. Positioning seams toward the rear reduces wear.
Step 3: Secure the upper collar (the part that grips the shift lever)
The upper collar prevents the boot from sliding down and bunching at the base.
- Pull the cover up to its natural ?rest? height with the shifter in neutral/park.
- Locate the collar area (elastic ring, stitched tunnel, or open top edge).
- Secure with one of the methods below:
- Zip tie method (most universal boots): Tighten a small zip tie under the shift knob area or at the boot collar. Trim the tail flush.
- Hose clamp method (heavy-duty trucks): Use a small clamp for a firm hold. Position the screw head where it won?t rub your hand.
- Factory ring method: If your OEM boot used a ring, reuse it if it fits and isn?t warped.
Practical tip: Don?t overtighten to the point that the collar wrinkles sharply. Wrinkles create stress points and can split vinyl in cold weather.
Step 4: Attach the lower edge to the bezel or floor ring
This is the step that determines whether the boot looks ?OEM? or looks like an add-on.
- Align the boot?s lower edge with the bezel opening.
- If the boot has a sewn-in lip, wrap it around the bezel frame evenly.
- Reinstall clips/retaining ring, or apply automotive double-sided tape where the boot meets the bezel frame.
For tape installs:
- Apply tape to the bezel frame, not the fabric/vinyl.
- Press the boot into place section-by-section to avoid wrinkles.
- Let it ?set? for a few minutes before reassembly.
Step 5: Check range of motion in every gear
Before snapping the bezel back in, confirm the boot doesn?t restrict movement.
- With the engine off, cycle through all gears.
- Watch the boot at full travel?especially 1st/2nd and reverse for manuals.
- Make sure the boot doesn?t pull tight like a drum at extremes.
- If it pulls tight: The boot is too short or mounted too low. Reposition the lower mount or upgrade to a taller boot.
- If it bunches excessively: The boot is too tall or mounted too high. Re-seat the lower edge and re-tighten the collar.
Step 6: Reinstall trim and do a final finish pass
- Reconnect any wiring and confirm connectors click into place.
- Press the bezel down evenly until all clips snap in.
- Wipe fingerprints and dust; apply a protectant appropriate for the material.
Material care reminder: Use a vinyl-safe protectant for leatherette/PU and a leather conditioner for genuine leather. Avoid greasy silicone products that attract dust?especially in work trucks.
Choosing the Right Gear Shift Cover for Commercial Use (Recommendations and Comparisons)
Commercial vehicle interiors need durability first, style second. Here?s how the most common materials stack up.
Genuine leather (best feel, premium durability)
- Pros: Excellent tactile feel, strong stitching potential, ages well if maintained
- Cons: Higher cost, needs conditioning, can dry/crack if neglected
- Best for: Owner-operators, upgraded cabs, long-haul comfort builds
Leatherette / PU (best value, easy cleaning)
- Pros: Affordable, wipe-clean, good appearance, widely available in universal fit
- Cons: Can split at stress points, may get stiff in extreme cold
- Best for: Fleet vehicles, delivery vans, daily work use with minimal upkeep
Canvas / heavy fabric (rugged and forgiving)
- Pros: Resistant to scuffs, hides dirt, flexible, good for tall shifters
- Cons: Can absorb odors, may look less ?factory?
- Best for: Off-road work trucks, construction use, muddy environments
Universal vs. vehicle-specific
- Vehicle-specific boot: Cleanest OEM-style fit, easiest bezel attachment, typically higher price
- Universal boot: More options, budget-friendly, requires careful trimming and clamping
Buying tip: For a commercial vehicle, prioritize double stitching, a reinforced collar, and enough boot height for full gear travel. If the listing doesn?t state height, ask or choose a known heavy-duty model.
Common Mistakes to Avoid (And How to Fix Them)
- Mounting the boot rotated: Crooked seams look sloppy and can rub. Fix by loosening the collar and re-clocking the boot using alignment marks.
- Overtightening the collar: Causes sharp creases and early cracking. Fix by backing off slightly and smoothing wrinkles with gentle heat.
- Under-tightening the collar: Boot slides down and bunches. Fix with a smaller zip tie or add a second tie above the first.
- Skipping range-of-motion checks: A tight boot can interfere with gear engagement. Fix by re-seating the lower mount higher or switching to a taller boot.
- Using household glue: It fails with heat/cold cycles and leaves residue. Use automotive-grade tape or proper trim adhesive if needed.
- Pinching wiring under the bezel: Leads to intermittent switch failures. Fix by re-routing harnesses and ensuring they sit in factory channels.
Troubleshooting: Real-World Installation Issues
The boot keeps popping off the bezel
- Check for broken bezel clips or a warped retaining ring
- Clean both surfaces and use automotive double-sided tape as support
- Make sure the boot material isn?t too thick for the bezel channel
The boot rubs the shift knob or interferes with the shift pattern
- Lower the collar position slightly
- Choose a boot with a slimmer upper opening
- Verify the knob isn?t oversized for your boot style
The boot looks baggy and collapses
- Mount the lower edge a bit higher if possible
- Use a boot with internal structure (stiffer material or reinforced panels)
- Confirm you didn?t buy a boot intended for a taller lever
Pro Tips for a Clean, Long-Lasting Install
- Warm the material before shaping: A hair dryer on low helps vinyl/leatherette relax and sit smooth.
- Double-check reverse and 1st gear clearance: These positions often show issues first.
- Keep fasteners organized: A small tray or magnetic bowl saves time and prevents missing screws.
- Match the cabin: If your steering wheel cover or seat covers are black with gray stitching, choose the same stitch color on the boot for a cohesive interior.
- Plan for cleaning: If you work in dusty environments, choose wipe-clean materials and avoid suede-like finishes that trap grime.
FAQ: Commercial Vehicle Gear Shift Cover Installation
How long does it take to install a gear shift cover?
Most installs take 30?90 minutes depending on whether you?re reusing the factory bezel, trimming a universal boot, or dealing with broken clips. A first-time DIYer should plan for about an hour so you can test fit and check gear movement carefully.
Do I need to remove the shift knob?
Often, yes?especially for manual shifters or tight-collar boots. Some automatic floor shifters allow the boot to slide over without removing the knob, but many require knob removal to avoid stretching or tearing the collar.
Can a universal gear shift cover fit my work truck?
Usually, but success depends on boot height, collar diameter, and how the lower edge mounts to your bezel or floor ring. Universal boots work best when you?re comfortable trimming and clamping for a secure fit.
Why does my new boot wrinkle after installation?
Wrinkles typically come from uneven lower mounting, the collar being too high/low, or the material being stiff from cold. Re-seat the bezel section-by-section, adjust collar tension, and use gentle heat to smooth the surface.
What?s better for commercial use: leather or leatherette?
Leather feels better long-term and can last for years with care. Leatherette (PU) is easier to wipe clean and is often the better pick for fleet vehicles where the priority is quick cleanup and lower replacement cost.
Will a new gear shift boot reduce noise or heat?
It can. A torn boot can let in drivetrain noise, road dust, and warm air from the transmission tunnel area. A properly sealed boot helps restore that barrier, especially on older vans and trucks.
Next Steps: Make It Look Factory and Keep It That Way
Once your gear shift cover is installed, take five minutes to do a final gear sweep, confirm the bezel is fully clipped in, and wipe down the material with the right protectant. Over the next week, pay attention to any rotation or creeping?small adjustments early prevent premature wear.
If you?re ready to take the cabin further, your next upgrades pair perfectly with a fresh shift boot:
- Steering wheel cover (for grip and matching materials)
- Seat covers (work-grade or custom-fit)
- Floor mats (all-weather or deep-channel for commercial use)
- Center console organizers to reduce daily clutter
Explore more hands-on interior guides and product tips at carinteriormix.com?your next upgrade is closer than you think.